In the background you can see the right aileron in the jig after drilling the rivet holes. The left aileron was at this stage yesterday.
I have to deburr and dimple the holes, prime the front skin and the end ribs, and then I can rivet the ailerons together.
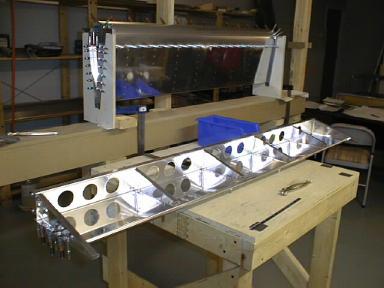 The left flap bottom skin, spar and ribs can be seen on the table, after drilling and clecoing them together.
Off the right rear, you can see the plans sitting on a desk.
The shelves used to store parts are visible behind the aileron.
At the left rear you can see the air line coming down from the garage. The air compressor is in the garage, and I put a piece of copper pipe through the wall to bring the air inside.