I've been fighting with fibreglas this week, and I'm about had my fill of this stuff. The wing tips are looking pretty good - I've just got a few tiny areas that need attention, at least until I shoot a coat of primer on, which will probably highlight a million pin holes.
 I attacked the empennage fairing again, after a year or more of procrastination. I had pretty poor fit at the leading edge of the vertical stab - the fairing was hitting against the leading edge of the horizontal stabilizer but it was still at least 3/8 inch away from the VS leading edge. So, I cut off the part of the fairing that hit the HS leading edge, so it would slide aft and fit against the VS leading edge. This week I put some electrical tape and wax paper on the aft fuselage and HS leading edges, clecoed the fairing in place, and laid up some fibreglas around the HS leading edges.
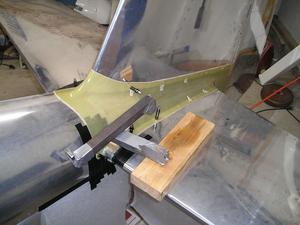
In this picture you see that I was using a couple of bucking bars to put some weight on the front corner of the empennage fairing, as it didn't want to sit down quite right. The new fibreglas I added wraps around the HS leading edge, so it holds the front of the fairing nicely in place.
 I noted that the fairing was sitting just clear of the aft fuselage, instead of sitting down nice and tight against it. I put some wax paper on the aft fuselage, then mixed up some West Systems fibreglas with microfibres, spread the mix on the underside of the fairing leading edge, then clecoed it in place. A bit of sanding to round off the edge of the fibreglas, and now it looks great. I also noted that it was lifting up a tiny bit between two clecoes on top of one side of the HS. An RV-3 builder reported good success using a heat gun to soften fibreglas to allow it to be reshaped, so I tried that - it worked great. Hopefully it is a permanent fix, and the part won't eventually regain its original shape.
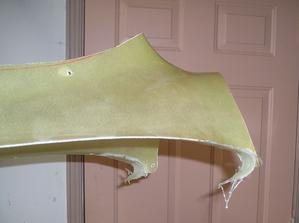
The canopy skirt is really giving me a hard time. I redrilled the holes on the aft end, and I thought it was fitting well, but now I find that there are gaps big enough to slip my fingers under. This is more than just a cosmetic problem, as any gaps will allow cold air to come in in the winter. Bad news. I tried using a heat gun to reshape it a bit, but the skirt seems to be made of some different type of fibreglas than the empennage fairing. It is green in colour, like the S-glass in the cowling. All the heat gun did was cause it to start to delaminate a bit, which isn't good.
The canopy skirt is a problem area because every aircraft is unique, so the part fits different on each plane. The top of the skirt attaches to the welded canopy frame, and each frame has a slightly different shape. And the canopy bubble attaches there two, and the canopy bubble is free-blown, so they are all slightly different. Add in variations in how each builder fits the frame to the fuselage, and you can understand why this is a common problem area.
I've pretty much decided that the only way I will get a good fit is to start from zero and make my own aft end of the skirt. I'll work on that this week.
 Update - 18 Aug 03 - This picture shows the gap between the aft end of the metal lower empennage fairing and the front edge of the flat portion of the upper empennage fairing. This issue is discussed in the comment below.