Well, true to form all the stuff I have been working on took longer than expected. But I am making progress.
I had the intercom harness modified to extend the length of the wires for the rear seat jack. I started putting it in, but got bogged down finding a good way to route the wires. I didn't want to just put the intercom wires in the main wire bundle, as that might be a recipe for having noise in the intercom. As I was puzzling out how to route those wires I noted that there was an issue with the way I had installed the altitude encoder. It was installed with the fitting for the static line on the top, which might mean that any moisture in the lines would drain in the encoder. Probably not a good idea. So I moved it so the fitting for the static line was on the bottom. That will also make it more accessible when I have it calibrated.
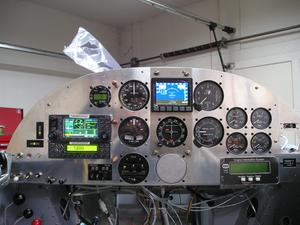 I finished the roll trim wiring yesterday. The trim indicators slip into the panel from the cockpit side, with the wire bundle connecting up behind the panel. The panel will have to come out eventually to be painted, once I've got all the holes in it. That means that I couldn't just use butt splices to connect the trim indicators to the trim system, as I wouldn't then be able to remove the panel. I didn't want to have to lie on my back under the panel and wire them up after the front upper skin is rivet on either. So I decided to put Molex connectors between the indicator and the trim wiring. That was a bit more work now, but it'll be much easier to slip the indicators in later and pop the connectors together. It also means that if the pitch trim indicator ever fails when I'm on the road I'll be able to replace it with the roll trim indicator, as that one is much less important.
My Electric Gyro Corp turn and bank indicator arrived a few days ago, so I hooked it up yesterday as well. There were no installation instructions in the box, and I couldn't find any markings on the connector that indicated which pin got the power and which one was the ground. I wasted twenty minutes surfing the web looking for that info, gave up, then noted that the nice bright white label on the top of the turn and bank not only had the model and serial number, it had a list of the connector pins and what had to be connected to each one.
I'm on the road a few days early this week, then I'll have to finish off the intercom wiring and attack the mount for the remote compass module for the EFIS.
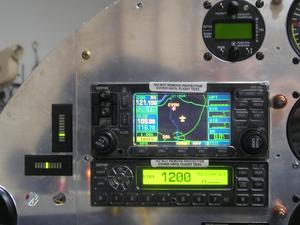 You can see the LED bar displays for the pitch and roll trim indicators to the left of the GPS.