This week I finished the wiring for the annunciator dimming. I wired them up early in the week, then did a functional test. I noted that something strange was going on - the Boost Pump annunciator lit up whenever the Brt/Dim switch was in Dim mode, and one of the other annunciators was lit, even though the boost pump as Off. It took a lot of head scratching, but I eventually figured out that I had current flowing in reverse through the Boost Pump motor windings. If the Brt/Dim switch was in Dim, the point where all the annunciator grounds were connected as at 5.1 V, if there was a lamp illuminated. But, the other end of the Boost Pump lamp circuit went through Boost Pump motor to ground. So, the lamp was getting a current through it, and it lit up. I noted that the same thing could happen to the Starter Relay lamp, but it wasn't seen now because I hadn't connected the starter motor to the starter contactor (I didn't want to risk having the motor turn over). I eventually figured out that I needed to put diodes in the circuits for those two lamps to prevent reverse current flow. Then I had to figure out how to mechanically add the diodes, so that the installation would be robust. It was an easy mod, once I discovered what the problem was, and figured out how best to install the diodes. But it cost me most of a day.
The Narco 122D finally arrived on Wednesday afternoon. Thursday I spent the whole morning trying to figure out exactly where to make the 3 1/8" hole for the 122D - I needed to put it high enough so it wouldn't hit the cross bar that goes between the landing gear boxes, and I needed to put it as low as possible so the instrument spacing looked consistent. I installed the instrument panel, and clecoed on the forward fuselage upper skin, as it held the instrument panel at the right angle. I took a gazillion measurements, then finally sorted out exactly where to make the hole.
I pulled out the fly-cutter, and saw that the cutter had a pretty had burr on it. It might work OK, or it might catch and destroy the instrument panel. I had too much time and money invested in it to risk destroying the panel, so I headed to Home Depot to buy a new fly-cutter. I decided to look for a 2-56 screw I needed while I was out (I had lost one of the screws for the Ray Allen trim indicators). I had t go to four different places before I finally found what I needed, but I learned that Valley Hardware has a very impressive collection of small bolts and screws (I needed 2-56 x 3/8 inch, flat head, black, but they had much smaller ones than that).
The new fly-cutter did a great job on the hole, then I hacked out the cut outs for the knobs at the corners. I discovered that I had to remove the knobs to get the 122D in the panel, and I didn't have the required tool - you need a Torx T-5 to remove the set screws. So, back in the car, for another epic journey around the city until I finally found the tool I needed.
Then I had to get the 122D in the the panel. Someone else wanted to get pictures to explain how that worked, so it is the subject of a separate article.
Today, finished cleaning up the various holes and cutouts so the 122D would fit in the panel. The Installation Manual called out a requirement for a support at the other end of the 122D. That made sense, as it was only held by two screws at the instrument panel end, it is quite heavy, and my aircraft will be able to pull 6g, or push to -3g.
But, it wasn't obvious how to make the support for the other end. You couldn't really see the other end, and it was quite close to the 803 bulkhead. I ended up crawling in the cockpit head first so my head was under the instrument panel to see the area in question. I must have crawled in there a a dozen time before I had figured out how to make the rear support, and where to drill the holes. It was a real pain, on my head, working by feel, but it all turned out great in the end, after several hours of work.
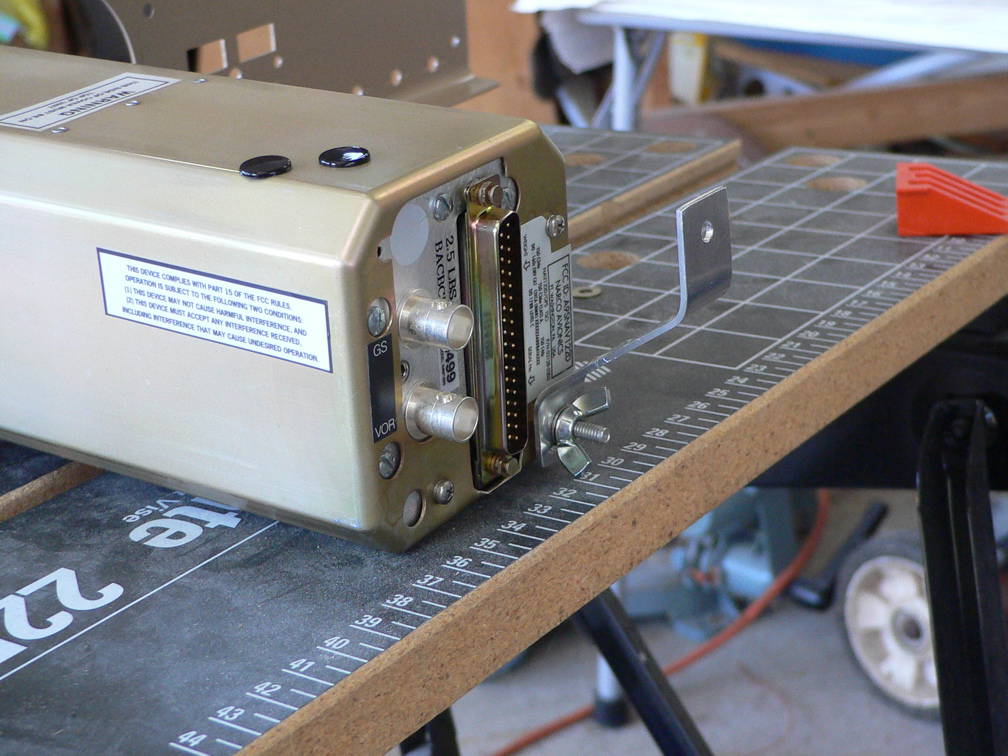 Here you see the bracket I bent up to support the other end of the 122D. This bracket is now bolted in place in the forward fuselage.
I had to push some of the wiring out of the way to get the 122D in place, so now I need to figure out how to secure that wiring so it won't chafe. And I need to connect the various wires and antennae to finish the installation.