I managed to borrow a home built engine hoist from an RV-6A builder - thanks Dale! It is very nicely constructed - very sturdy, and it comes apart into several pieces to simplify the transportation and storage.
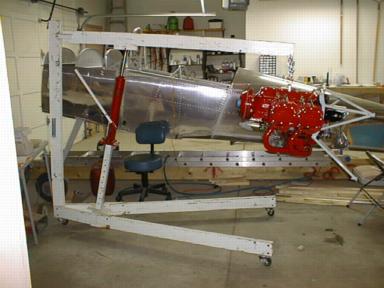 I mounted my engine today, and learned a few things worth sharing.
You must install an AN823-4 45° fitting near the upper right engine mount. The line to the oil pressure gauge or pressure transducer will attach here. It is so close to the engine mount that it will be impossible to screw the fitting in once the engine is on the mount.
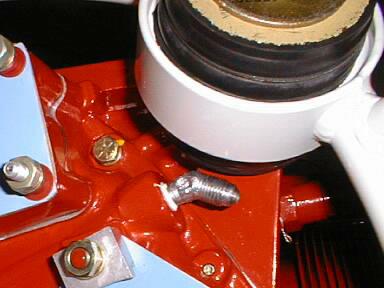 The fitting should be steel (to minimize the chances of it breaking), should be modified with a restrictor orifice (to minimize the rate of oil loss if the line should ever break), and must be oriented straight down. I had been warned about the need to install this fitting first, but it turned out that my engine overhaul shop (Aero Sport Power) had already installed it for me.
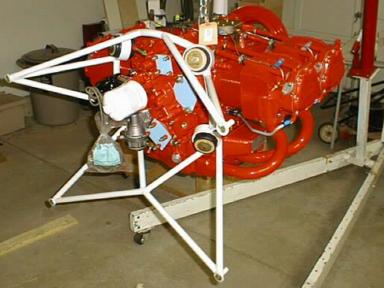 I bolted the mount to the engine first, then bolted the mount and engine to the airframe. This worked very well, and I highly recommend this approach. I did the whole job without any assistance - it took me about 40 minutes, not including the time to final torque the bolts.
I used some duct tape to hold the cups that go between the mount and engine to the mount, as well as the big washers that go between the lower cups and the engine. The first mount was assembled and tightened most of the way. It was then fairly easy to use a 3/8 punch and some hand pressure to align the holes in the other forward cups with the engine and then get the bolt started, then tightened most of the way. The 3/8 punch is small enough to allow it to slip in the holes when the cup is almost aligned - you can then move it sideways to get the holes to line up. A block of wood and hammer was used to tap the bolts the rest of the way in. (the bolts are 7/16, so the smaller punch simplifies the alignment.
It took me about 30 minutes working alone to get the mount bolted to the back of the engine, the first time. Then I realized that all four bolts are not the same length, and that I had managed to get top bolts in the bottom holes :( Pay attention to the bolt callouts on the drawings!!
I was able to get a box wrench on three of the nuts easily, but the upper left one was a problem. I modified a wrench by grinding a thin spot on the box end so I could get it to fit between the end of the bolt and the pushrod tube. I've got an IO-360A - I'm not sure if the O-360s are the same in this area or not.
It was a pain getting the cotter pin in the lower left bolt, but I managed to get it done.
It took me about 10 minutes, working alone, to get the engine mount bolted to the aircraft. I haven't torqued the bolts that hold the mount to the airframe yet, because I'm betting the mount will have to come off to allow me drill a few more holes through the firewall.