Fuel tank fabrication
- Details
- Written by Kevin Horton
- Hits: 4357
The fuel tanks are the last big part of the wing that I have to build.
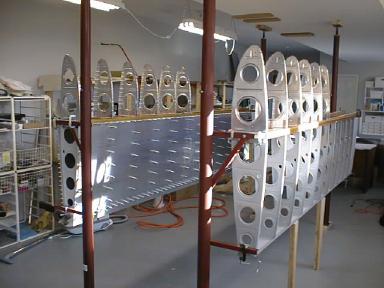
I've spent the last two weeks preparing the Z brackets that hold the fuel tanks to the spar, deburring and fluting the ribs for the right tank, and doing a whole bunch of other prep work. I never knew there were so many pieces in a fuel tank (each tank is assembled from over 80 parts, not counting rivets and screws).
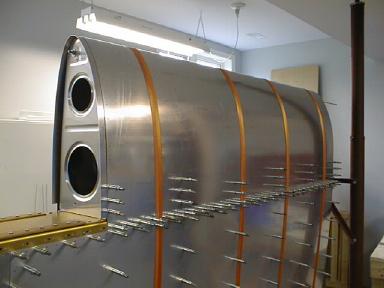
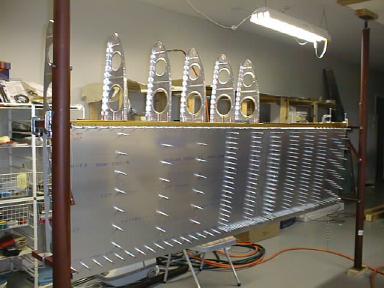
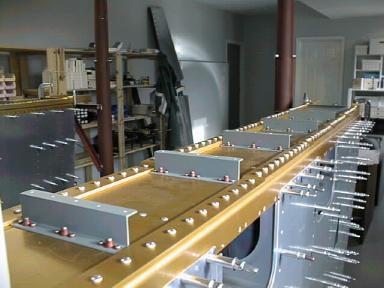 Here you see six of the seven Z brackets that hold the tank to the main spar. Each Z bracket has three anchor nuts riveted to it, so that they can be bolted to the spar. The access covers in the lower surface of the wing provide access to the bolts.
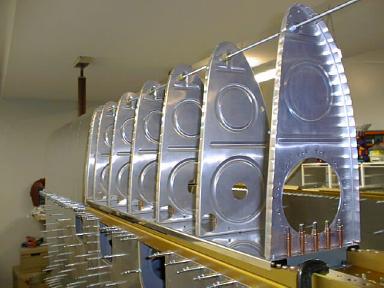 Here you see the tank back wall and ribs clecoed to the Z brackets.
The most inboard rib (closest to the camera) has a hole to provide access to the inside of the tank for inspection purposes. The cover will also hold the fuel quantity sender and the fuel pickup.
You can also see some of the holes that I drilled in the tank ribs. The tank ribs divide the tank up into bays to keep the fuel from sloshing around in turbulence or during manoeuvring. The holes allow fuel and air to pass from bay to bay.
I am using a threaded rod with nuts and washers to hold the ribs steady while I drill and cleco the skins on.
I am going back on the road again for one or two weeks, so things will grind to a halt yet again.
Riveting skin to leading edge
- Details
- Written by Kevin Horton
- Hits: 5023
Here I am riveting the left leading edge. The leading edge skins are riveted to the nose ribs in a cradle. Later, the whole assembly is riveted to the rest of the wing.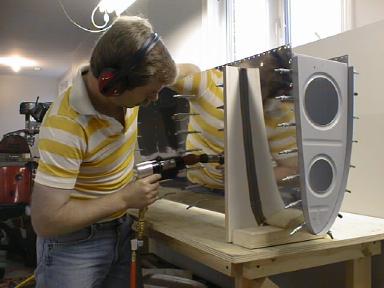
Read on for more.
Skin clecoed to leading edge
- Details
- Written by Kevin Horton
- Hits: 3740
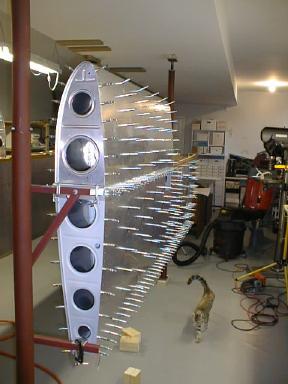
Here is the right wing after drilling and clecoing the outboard leading edge to the skeleton.
The little wooden blocks that you see on the floor were placed against the rear spar to keep the straps from pushing against the main skins.
 The cat keeps on coming down to see what I am doing. She is not going to be happy until she finally figures out what I am doing with all those clecos. Her main mission is to attack every one that I drop and bat it under the workbench.
I think I am going to be home for a couple of weeks at least, so I hope to make some good progress again.
Straping the skin on the leading edge
- Details
- Written by Kevin Horton
- Hits: 3359
I got back from 10 days on the road late on 30 October and then attacked the outboard leading edge on the right wing.
I used a threaded rod with nuts and washers through the tooling holes at the front of the nose ribs to keep them from flopping around. The rod wasn't fastened to the jig - it provided enough stability as is.
 Four nylon strap clamps did a great job of holding the skin tight to the ribs. Here you can see what things looked like as I started to drill and cleco the skin to the ribs.
Basically, you start drilling at the spar on the top of the wing, and move forward, pushing the skin down as you go. You want to work any slack out of the skin, pushing it around to the spar on the bottom. Then you trim the skin to fit properly at the spar.
Both wings in the jig
- Details
- Written by Kevin Horton
- Hits: 3655
I put the second wing jig on Saturday 17 Oct 98.
The second time goes a lot quicker than the first, because you learn a lot from the screw ups made the first time, plus you don't need to spend as much time studying the plans.
 I expect I will save quite a bit of time by building both wings at the same time, because as soon as I do a task on one wing I can do it on the second while everything is still fresh in my mind.
Tonight I will start drilling and clecoing the skins to the second wing.
I am going back on the road again for 10 days starting on Wednesday 21 Oct, so the project will go on hold again.
Left wing with skins
- Details
- Written by Kevin Horton
- Hits: 3201
Here is the left wing after drilling and clecoing the top skins to the skeleton.
 Terry drilled the holes mid-span where the inner and outer skins meet. She wouldn't let me take her picture though - she was afraid some of her sisters might see her with a power tool in her hands.
I also got about one third of the bottom wing skins drilled and clecoed before stopping for the night.
It is great to finally see a really big part taking shape before my eyes!
The nose ribs (the bit at the leading edge of the wing, topmost in the picture) are only clecoed on, as they have to be removed later to allow the nose skin to be riveted to them.
